Product Creation
- Mar 31, 2022
- 4 min read
Updated: Feb 23, 2023
About Windo
Windo is a no-code online store creator platform for small businesses, creators, influencers, and mid-sized sellers. It offers easy-to-use plug-and-play support to get you started with an online shop in minutes.
Product Creation on Your Window Store
Windo provides you with several options while adding products to your shop. Follow the below steps to get started.
Open the Windo mobile app.
On the home screen, tap on Products.
Tap on Add Products on the top-right corner.
Here is where you can start creating products for your online store.
Product Details
Add images or videos for your product.
Note: Please make sure the max size limit for images is 5 MB and 50 MB for videos per product.

Add a name for your product.
Set a price and a strike-off price on your product. Setting a strike-off is optional. You can add it when you plan to sell your product at a discounted price.
Note: The strike-off price must be the original price, and the price is the discounted price. The value that you enter for the strike-off price will be stroked-out.
You can view a preview of how your prices will be displayed to customers.
Set a product unit and quantity. Tap on the dropdown to choose from a list of existing product units.
Note: The product unit is the quantity you wish to sell. This will be different from stock. The stock quantity is the total quantity available in the inventory. For example, you have one quintal of rice available in stock, selling only 1 kg per order.
You can even set up a custom product unit. Product units vary based on the product.

The price per unit preview is shown below to tell you what your customers will see.
Add a description for your product.

Units & Stock
Under the “How many units do you have in stock?” option, select if you have an indefinite stock (Always in Stock option) or limited stock. If you select the Limited Stock option, you must set the number of items available under the Availability field.
Your product will be shown as Out of Stock when the available quantity turns 0.
Collections & Variants
You can add collections and variants of your products under this section.
Collections
If your product belongs to a specific collection in your store, you can create and add the product into that collection while creating your product.
For example, you have a Halloween collection of products. This option is perfect for helping classify them in your store.
Or, you may even choose from an existing collection that you have created.
To add collections, tap on Collections.
If you have already created a collection, select one from your existing collections.

Or, you can quickly add a collection.
To create a collection, tap on Add Collections on the top-right corner or the plus icon on the bottom-right corner.
Add an image or icon for your collection.

Enter a collection name.
Tap on Add Collection to finish creating your collection.
Next, select the newly-created collection.
Tap on Save
Your product will now be added to your collection.
Variants
If you have variants to your product, for example, size variants such as size small (S), medium (M), large (L), extra-large (XL), and so on, you can use this option to add them.
To add variants of your product, tap on Add Variants. By default, you can add size and color variants.
Size Variants
You can set size variants for your product in this setting.
To add a size variant, tap on Add Size.

Under the Size field, enter the available size.
Set a product price and strike-off price.
Set the availability details.
To add images or videos of your variant, tap on Add Image. Upload images or videos to your variant.

You can add multiple size variants to your product. You can even delete size variants if you wish to.
Color Variants
You can set color variants for your product in this setting.
To add a color variant, tap on Add Color.
Pick a color from the color picker by tapping on Pick A Color.
To add images or videos, tap on Add Image.

You can add multiple color variants to your product. You can even delete color variants if you wish to.
Custom Variants

You can even add custom variants for your product.
To add a custom variant, tap on the Custom Variant tab on the top.
Add a variant title of your choice.
Enter a variant type.
Enter a price and a strike-off price.
Set the availability details.
Add images or videos.
You can add multiple custom variants to your product. You may even delete custom variants if you wish to.
Once you are done setting your variants, tap on Save & Proceed.
Other Details
Under the Other Details option, you can set customization and tax-related details.
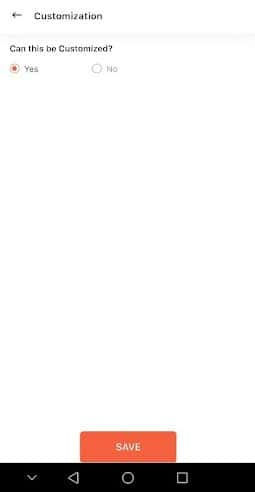
Customization
Tap on Customization.
Here, you can select if your product can be customized or not.
Once you are done, tap on Save.
More details
Here, you can add more details regarding your product, for example, taxes, shipping time, and more.
Tap on More details.
Taxes
Under the “Are taxes included in this price?” option, select if the displayed prices include taxes or not.
Next, set the Tax Slab for your product.
Once you are done, tap on Save.

Shipping Time
To set shipping options, tap on Shipping Options under the Shipping Time section.

Here, you can set the shipping timelines for your product.
Select the minimum and maximum time of your delivery. You can select the unit of time in Minutes, Hours, Days, and Weeks.
Set the estimated delivery time for your product under the Your Delivery Timeline section.
Once you are done, tap on Save.
Finally, when you are done creating your product listing, you can choose Save as Draft if you do not wish to publish your product immediately.
To publish it immediately, tap on Add product.
View Created Product
Follow the below steps to view your product page.
On the home screen of the Windo mobile app, tap on Products.
Here, you will see all the products listed.

To view the product page of your newly created product in the browser, tap on Preview.


You have now successfully created and viewed your product!
