Creating a Windo Account & Building Your Online Store
- Mar 31, 2022
- 5 min read
Updated: Feb 23, 2023
Welcome to Windo!
Windo is a no-code online store creator solution for solopreneurs, small businesses, influencers, creators, small and mid-sized sellers, and teams.
Creating a Windo Account
To get started with your simple online shop in minutes, you must have a Windo account. Follow the steps below to create your account.
Step 1:
Download and install the Windo app on your iPhone or Android device.
Step 2:

Open the Windo app. You will be asked to allow Windo access to your media and files. Tap on Allow.
Step 3:
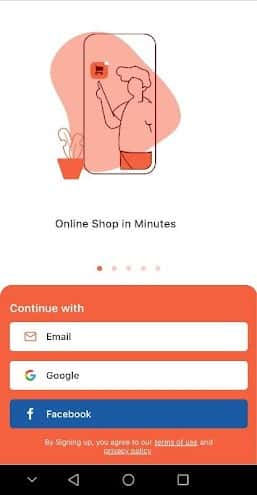
Create your account using an email address, a Google account, or a Facebook account. Please read the terms of use and privacy policy carefully before agreeing to them.
Step 4:
Once you sign up, you should see the Create Your Shop page. This indicates that you have successfully created your Windo account.
Building an Online Shop in Minutes
Now that you have set up your account, it is time to create your beautiful online store. The Windo’s online store creator will help you get started in minutes. Follow the steps mentioned below to create your Windo store.
Step 1:

Add your preferred name under the Enter Shop Name field, on the Create Your Shop page. Make sure this name is unique. For example, Kristen’s Kookies.
Step 2:
Under the Shop URL field, you will see a default shop URL created for you. However, you can change it to anything you prefer. Please make sure the shop URL is unique.
Enter your shop’s URL name without spaces. For example, Kristen’s Kookies. Your shop URL will now, by default, be mywindo.shop/kristenskookies.
Note: You can choose a custom shop domain later.
Step 3:

Select a country and a preferred currency option.
Step 4:

Select your preferred shop language. You can change the shop language later in the settings. Once you are done, tap on Create Shop. Viola! Your shop is now created!
Setting Up My Online Store
Now that you’ve created your shop, you need to set it up for your customers. Follow the steps given to finish building your store.
Step 1:


You will now see several coach marks to help you around Windo. You should be on your Dashboard page. Follow the coach’s steps by tapping on the buttons on focus to get a quick walkthrough of your dashboard.
Windo Dashboard
The Windo Dashboard page will give you an insight into what your online store looks like and how you can manage it. The Overview section shows you the total number of products in your store, new orders, and total billings.
Store Set-up Progress Tracking

Next, you will see a progress chart determining your store set up progress. This chart will disappear as soon as you finish setting up your store. You can follow the steps listed below the progress chart, to complete the store launching process.
Take a Tour

You can even take a look at one of our top-rated stores. Tap on Take a Tour to view a store.
How it works?
The How it works section gives you quick tips on what you can do on Windo.
Step 2:
You can now start adding your first product to your shop. Tap on Add Products below the progress chart.
Step 3:

Add images or videos for your product. Please make sure the max size limit for images is 5MB, and 50MB for videos per product.
Step 4:
Add a name for your product.
Step 5:
Set a price and a strike-off price on your product. Setting a strike-off is optional. You can add it when you plan to sell your product at a discounted price. The strike-off price must be the original price and the price is the discounted price.
You will see a preview of how your prices will be displayed to customers.
Step 6:

Set a product unit and quantity. Tap on the dropdown to choose from a list of existing product units. You can even set up a custom product unit.
You can look at the price per unit preview shown below to know what your customers see.
Step 7:

Add a description for your product.
Step 8:
Under the “How many units do you have in stock?” option, select if you have an indefinite stock (Always in Stock option) or limited stock. If you select the Limited Stock option, you must set the number of items available under the Availability field.
Your product will be shown as Out of Stock when the available quantity turns 0.
Step 9:
Next, you can add collections and variants of your product.
Collections

To add collections, tap on Collections. Select a collection from your already created collections. Or, you can quickly add a collection.


To create a collection, tap on Add Collections on the top-right corner or the plus icon on the bottom-right corner
Add an image or icon for your collection
Enter a collection name
Tap on Add Collection to create your collection
Next, select the newly-created collection
Tap on Save
Default Variants
To add variants of your product, tap on Add Variants. By default, you can add size and colour variants.
Size Variants


You can set size variants for your product in this setting
To add a size variant, tap on Add Size.
Under the Size field, enter the available size.
Set a product price and strike-off price.
Set the availability details.
To add images or videos of your variant, tap on Add Image. Upload images or videos to your variant.
You can add multiple size variants to your product. You may even delete size variants if you wish to.
Colour Variants

You can set colour variants for your product in this setting
To add a color variant, tap on Add Colour.
Pick a color from the color picker by tapping on Pick A Colour.
To add images or videos, tap on Add Image.
You can add multiple color variants to your product. You may even delete color variants if you wish to.
Custom Variants

You can even add custom variants for your product. To add a custom variant, tap on the Custom Variant tab on the top.
Add a variant title of your choice
Enter a variant type
Enter a price and a strike-off price
Set the availability details
Add images or videos
You can add multiple custom variants to your product. You may even delete custom variants if you wish to.
Once you are done setting your variants, tap on Save & Proceed.
Step 10:
Under the Other Details option, you can set customization and tax-related derails.
Customization

Here, you can select if your product can be customised or not.
Once you are done, tap on Save.
More details
Taxes

Under the More details option, you can select if the displayed prices include taxes or not. You can even set the Tax Slab for your product.
Once you are done, tap on Save.
Shipping Time

Here, you can set the shipping timelines for your product. Let your customers know the minimum and maximum time of your delivery. You can select the unit of time in Minutes, Hours, Days and Weeks.
Windo will let your customers know the estimated delivery time for your product under the Your Delivery Timeline section.
Once you are done, tap on Save.
Step 11:
Finally, when you’re done creating your product listing, you can choose Save as Draft or publish it immediately by tapping Add product.
Step 12:


You should now see your progress chart increase, and the Add Products step is marked complete. Tap on View Products to see your products.
Step 13:

Now tap on Preview to view your product page on the browser.
Choosing Payment Modes
Lastly, you can set up payment modes that you prefer by tapping on Activate Payments.
Online

You can choose an online mode of payment from the options available in your country.
Manual

Alternatively, you can even choose a manual mode of payment such as Bank Transfer, UPI, etc. To enable a manual mode of payment, tap on Add and enter the required details. You can even choose to ask for payment screenshots from your customers before confirming their orders.
You have now successfully created a Windo account and launched your beautiful online store!


